Xeno Mounts install
Time to install: 10–15 minutes.
Xeno Mounts hold your Pin Stadium light bars in place permanently — so you never have to remove them again when raising or lowering the playfield. They also route the rear ribbon cables cleanly so they don’t get pinched.
⚠ Read this before starting
- Install Xeno Mounts FIRST, then the Magna-Mounts. Always in that order.
- Stern Spike 2 machines: these instructions are still being updated. Take your time and email us before forcing anything.
- Take your time and don’t rush — this install lasts forever once it’s done right.
Lay out all four Xeno Mounts (#1 Front Right, #2 Front Left, #3 Rear Left, #4 Rear Right) and proceed to Step 1.
Step 1
Install all four Xeno Mounts (do NOT mount the light bars yet)
Install all four Xeno Mounts before putting any light bar onto them. Once all four are in place, you’ll mount the light bars in the final step.
Note for all front Xeno Mounts: the front end of the light bar pressure-fits into the triangle-shaped top of the front mount.
#1 — Front Right Xeno
Remove the factory bubble leveler from the bottom right of the playfield (2 screws). Position the #1 Xeno Mount in its place, all the way forward (furthest from the shooter lane). Snug the screws so the mount holds.
With a small flathead screwdriver, pop the factory bubble out of its original holder and pressure-fit it into the Xeno Mount.

#2 — Front Left Xeno
On the opposite side (left), remove the factory screw holding the apron wire form’s post. Position the #2 Xeno Mount and replace the screw through its hole. Make sure the apron wire form sits back in place.
Snug the screw — not too tight or you’ll crack the mount. Don’t put the light bar in yet — wait until all four Xenos are installed.
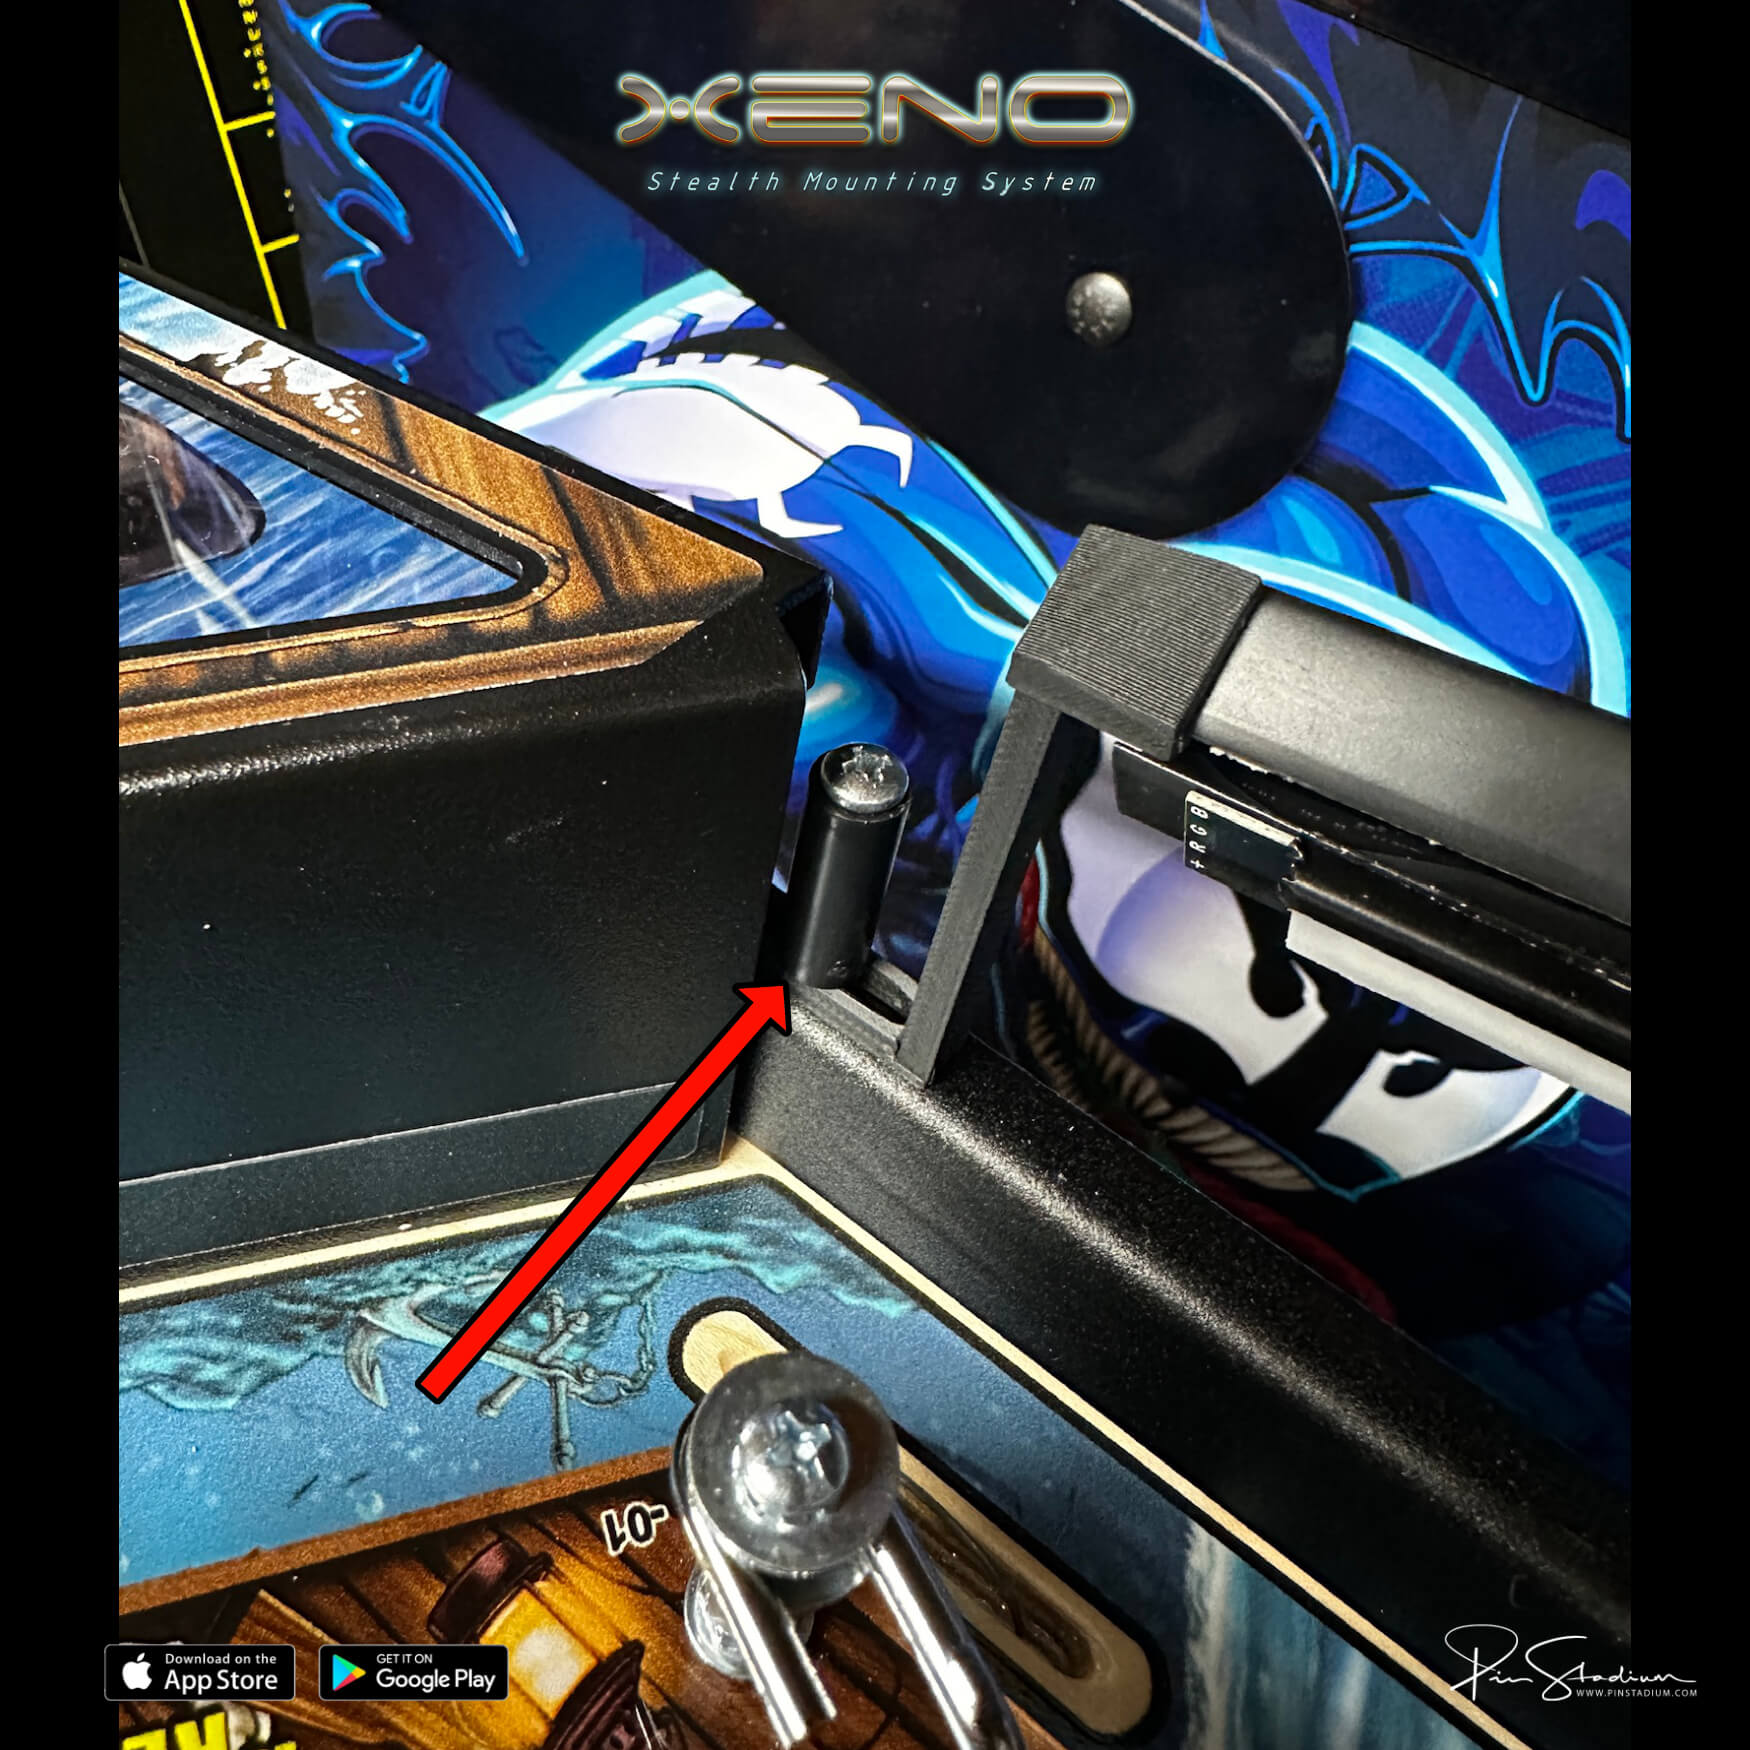
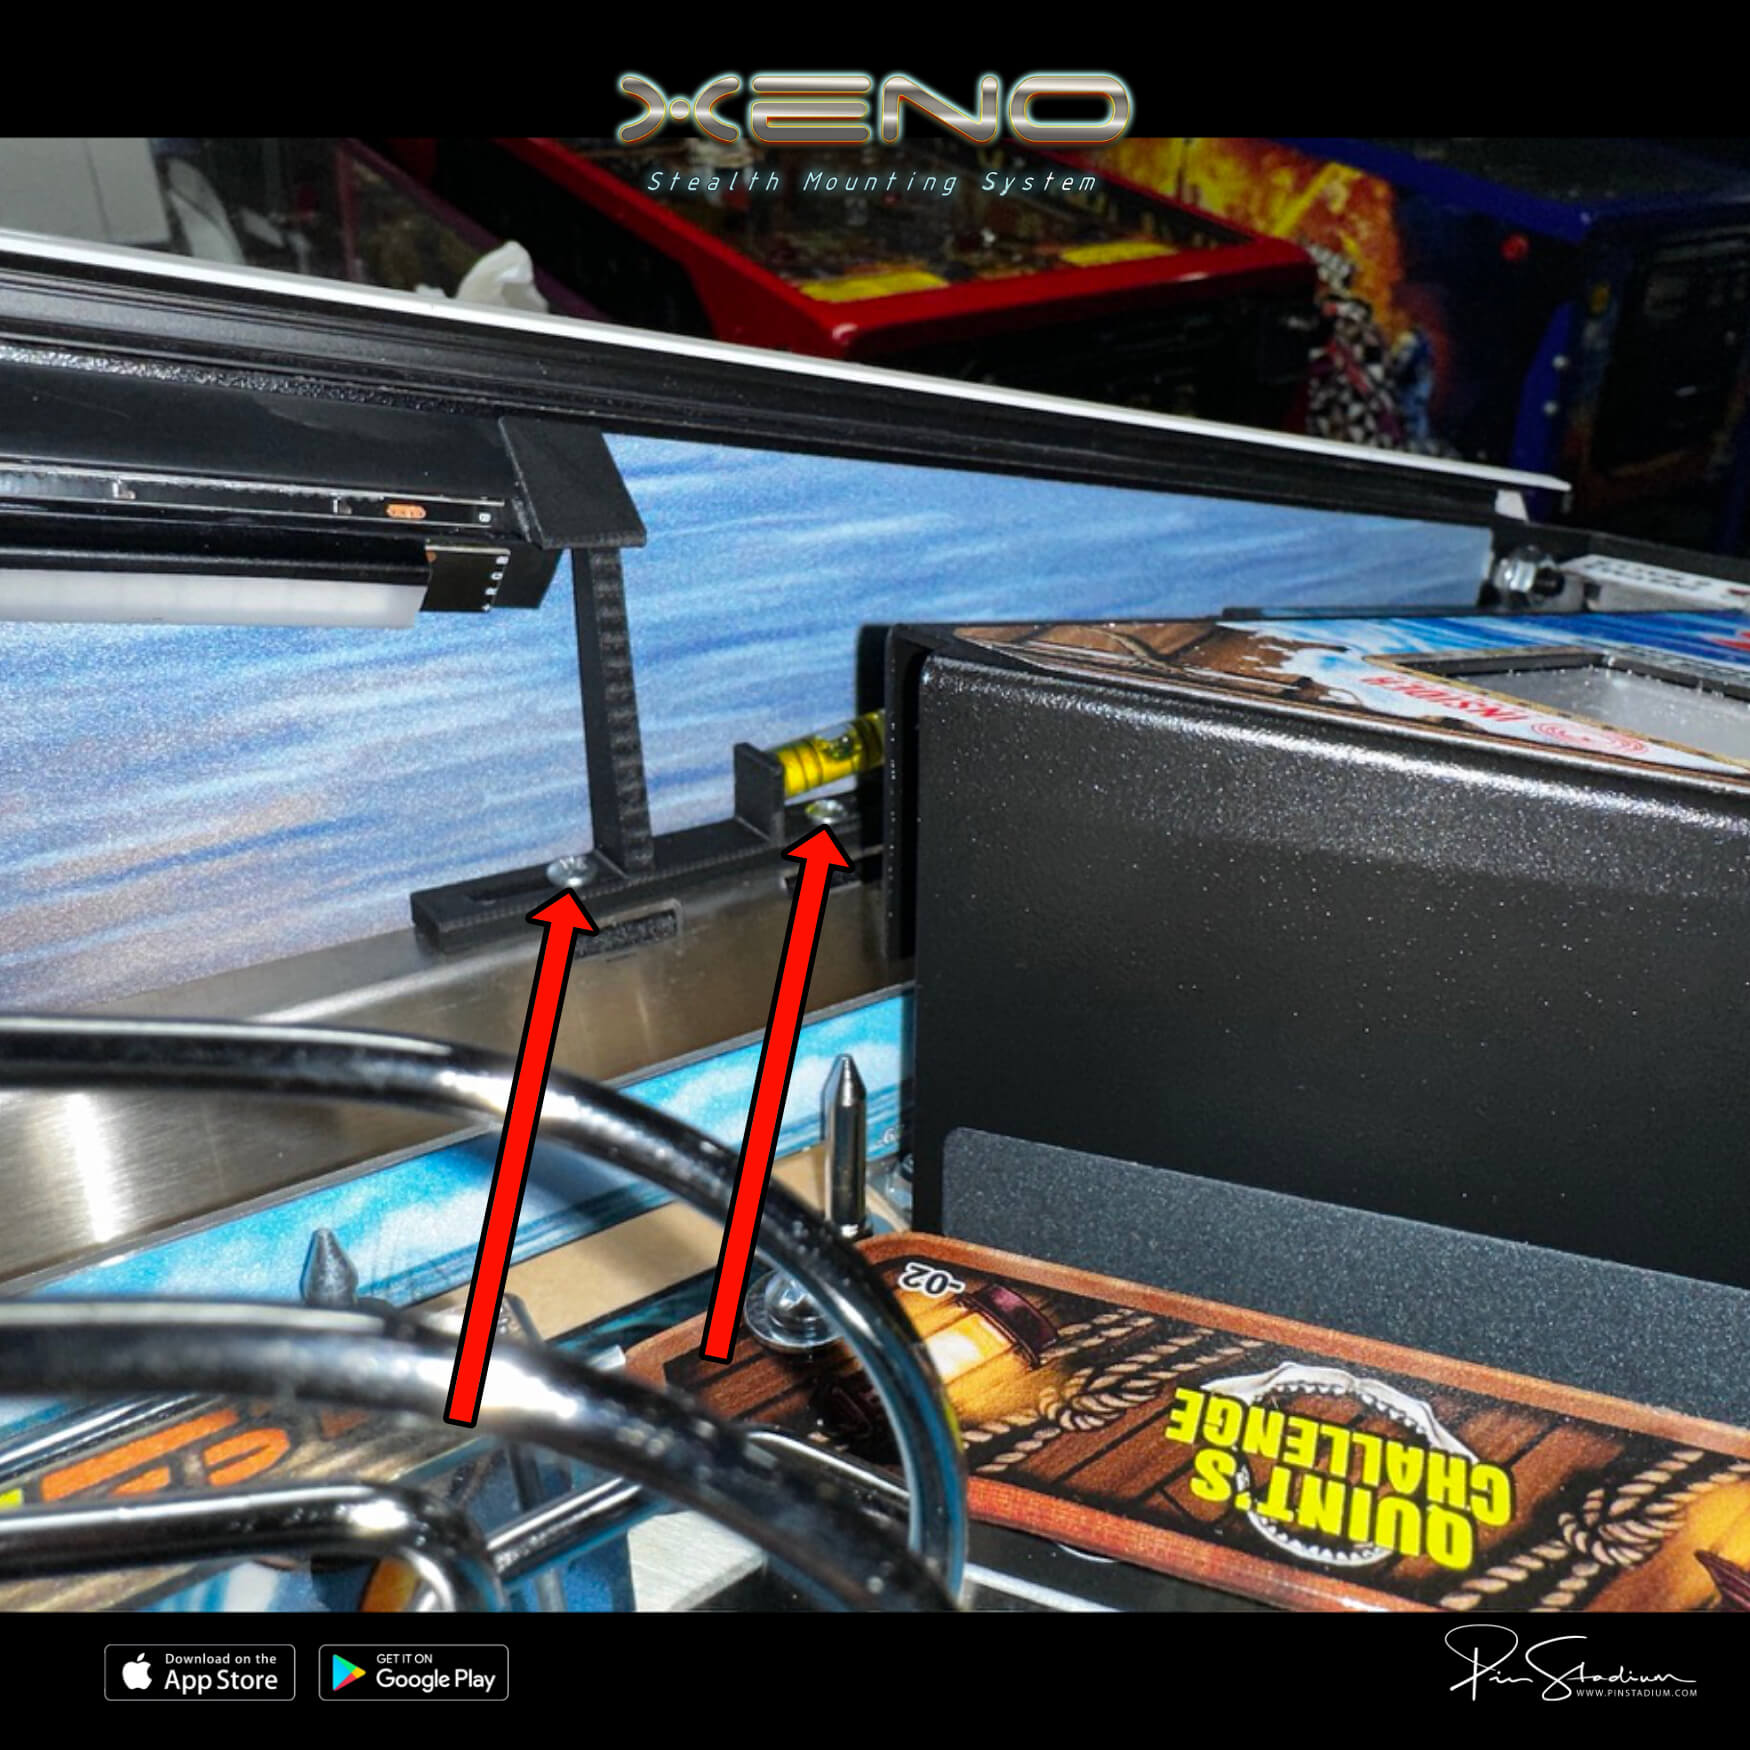
#3 & #4 — Rear Left and Rear Right Xenos
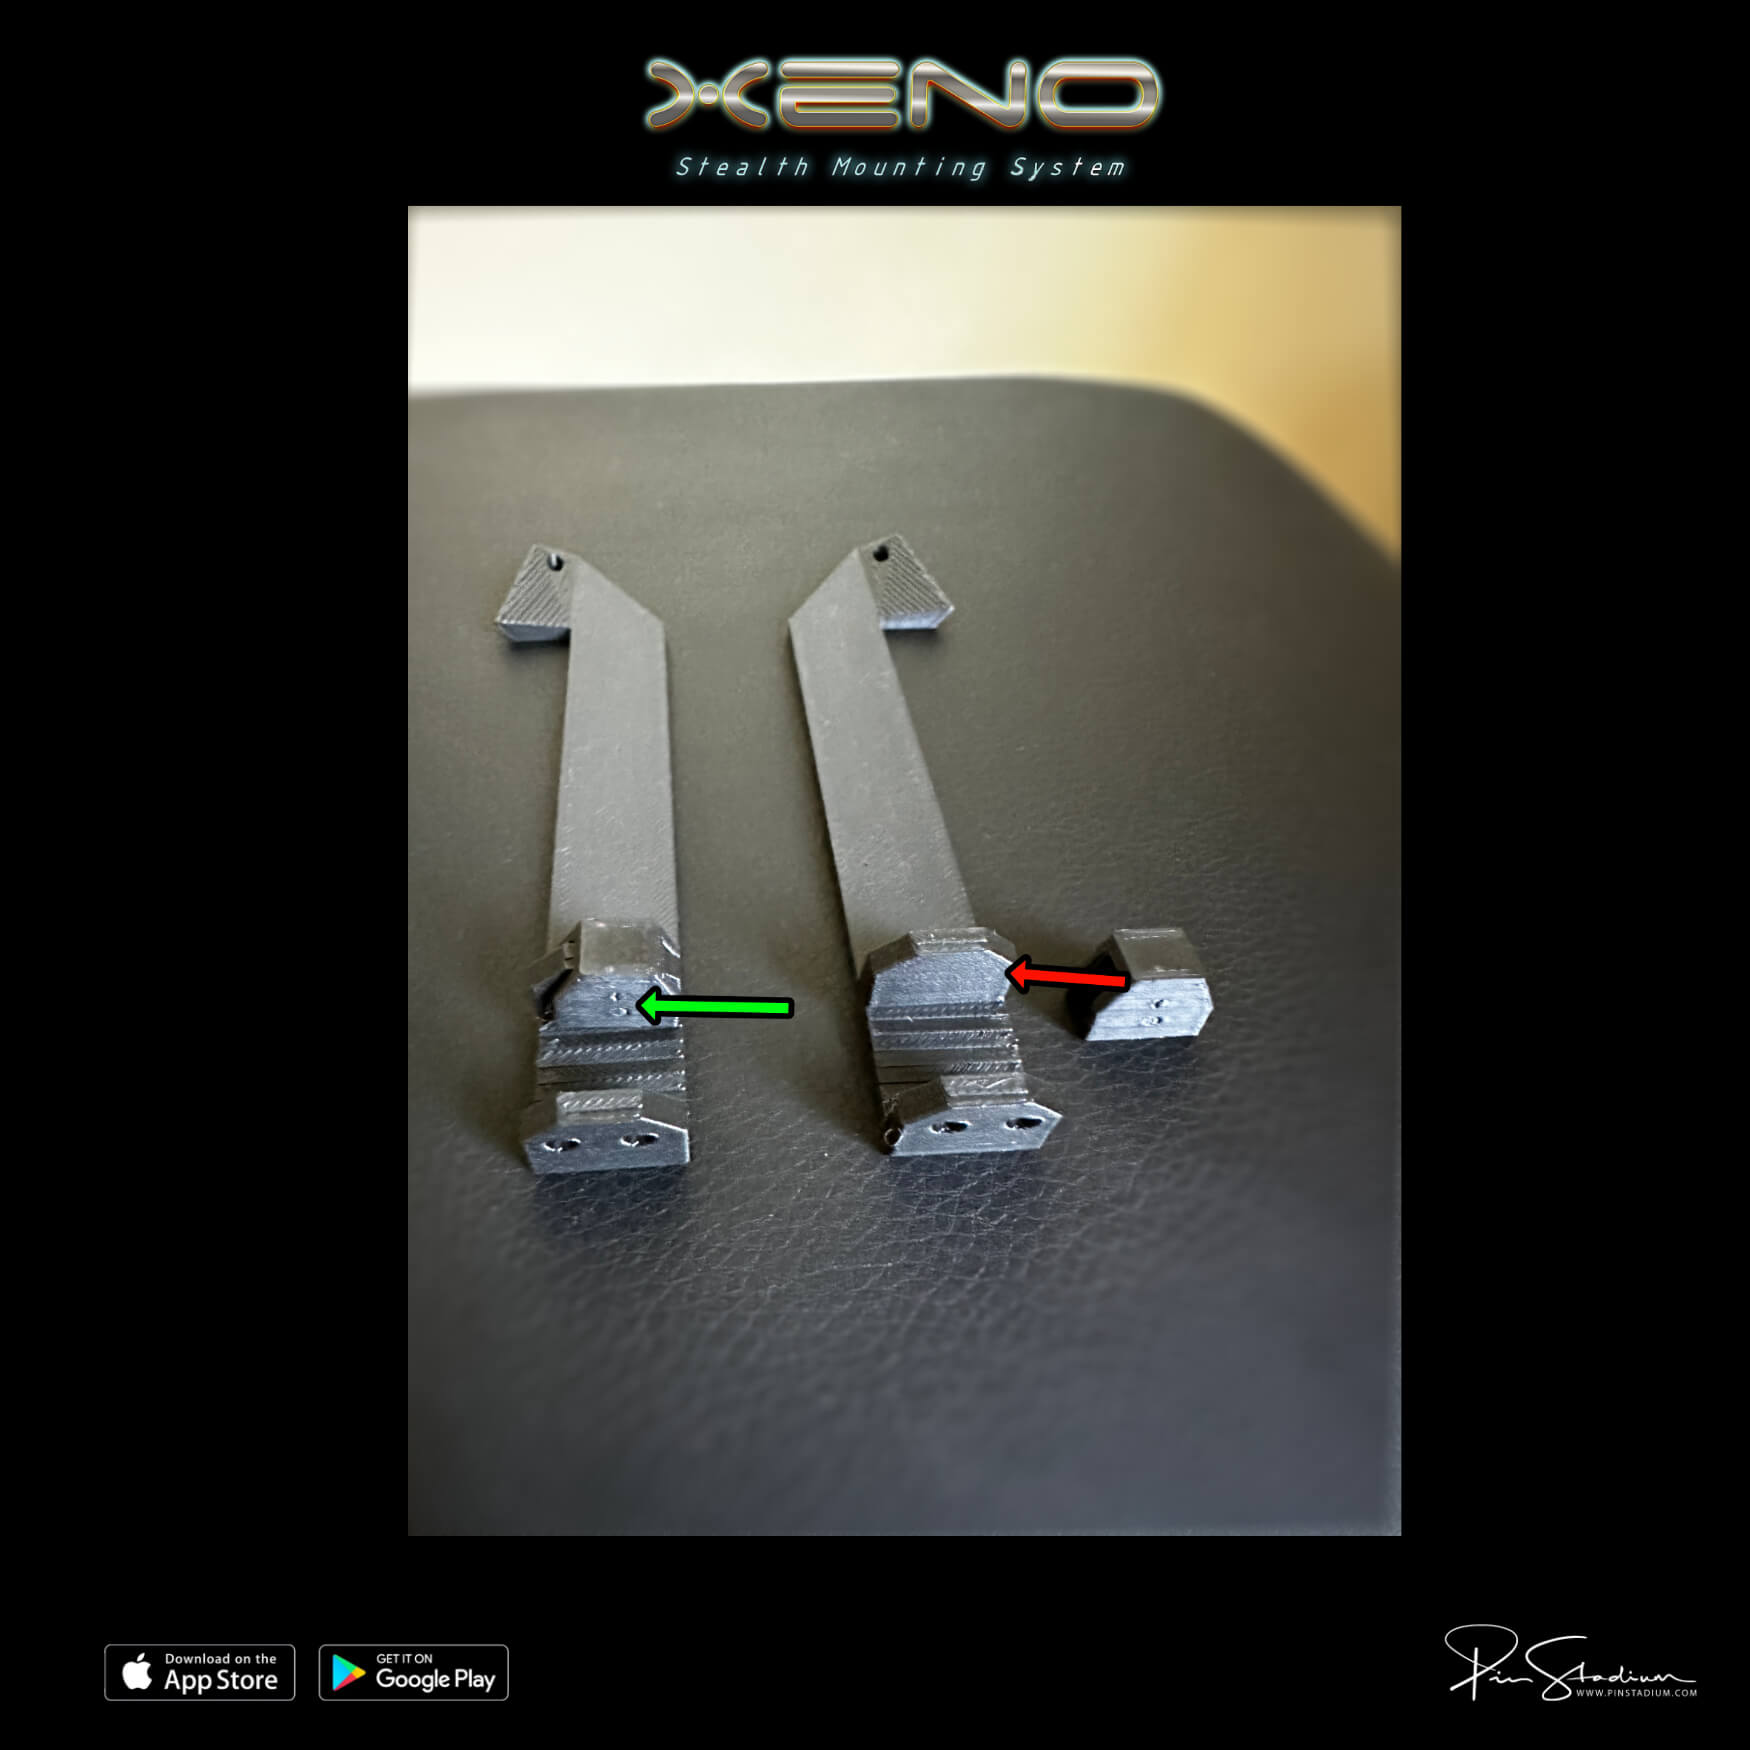
Slow down here. The rear mounts use small spacers that need to be oriented correctly for your machine. Take it step by step.
- Check your backboard: if it’s bare wood, slide on a spacer with the 2-small-circles side facing the backboard. If your backboard already has a plastic layer on top, you may not need a spacer at all. The goal is a snug temporary fit.
- Position the rear mount on the rear edge of the backboard (left for #3, right for #4). Don’t screw it in yet.
- Lower the playfield carefully back into play position. Rest a light bar on top of the mount and adjust the Xeno’s height so the light bar clears the glass-slide line (with a little room for the zip tie too).
- Mark the position with tape or a dry-erase line on the backboard. Repeat for the other side.
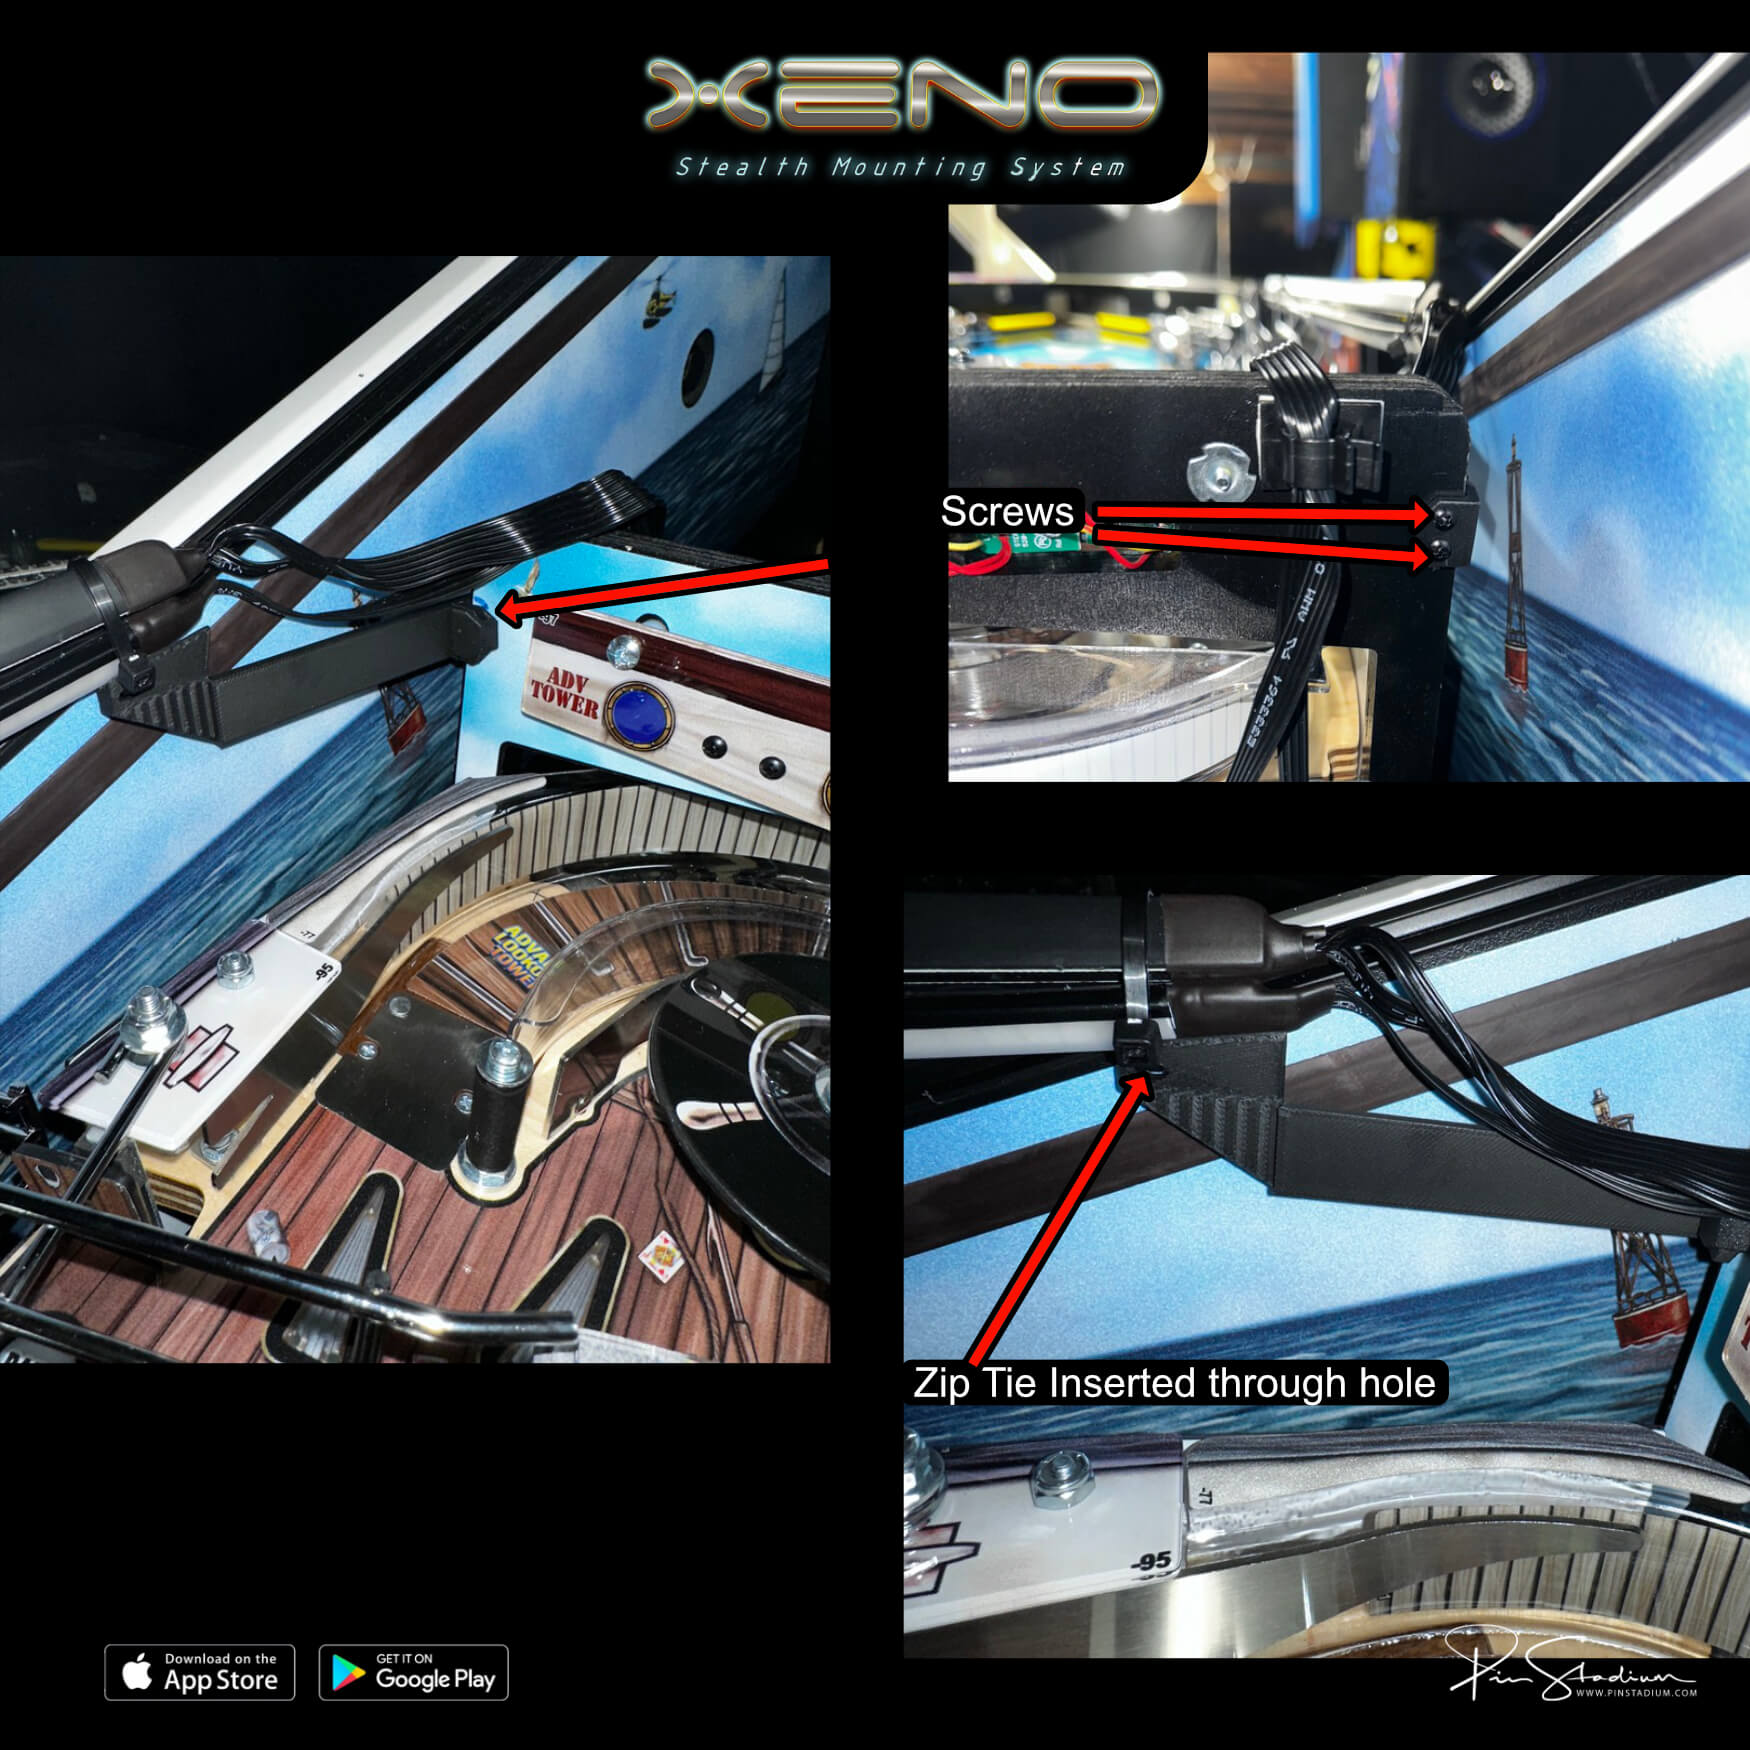
- Pull the playfield out to its maintenance rest position. Hold each rear mount aligned to your mark and drive in 2 screws.
Final step — mount the light bars into the Xenos
- Front: press-fit the front end of each light bar onto its front Xeno Mount (triangle pressure-fit).
- Rear: rest the rear of the light bar into the “V”-shaped base of the rear Xeno. Loop a zip tie around the light bar and through the hole in the Xeno (or around the Xeno if yours doesn’t have a hole). Leave the zip tie loose for now so you can adjust.
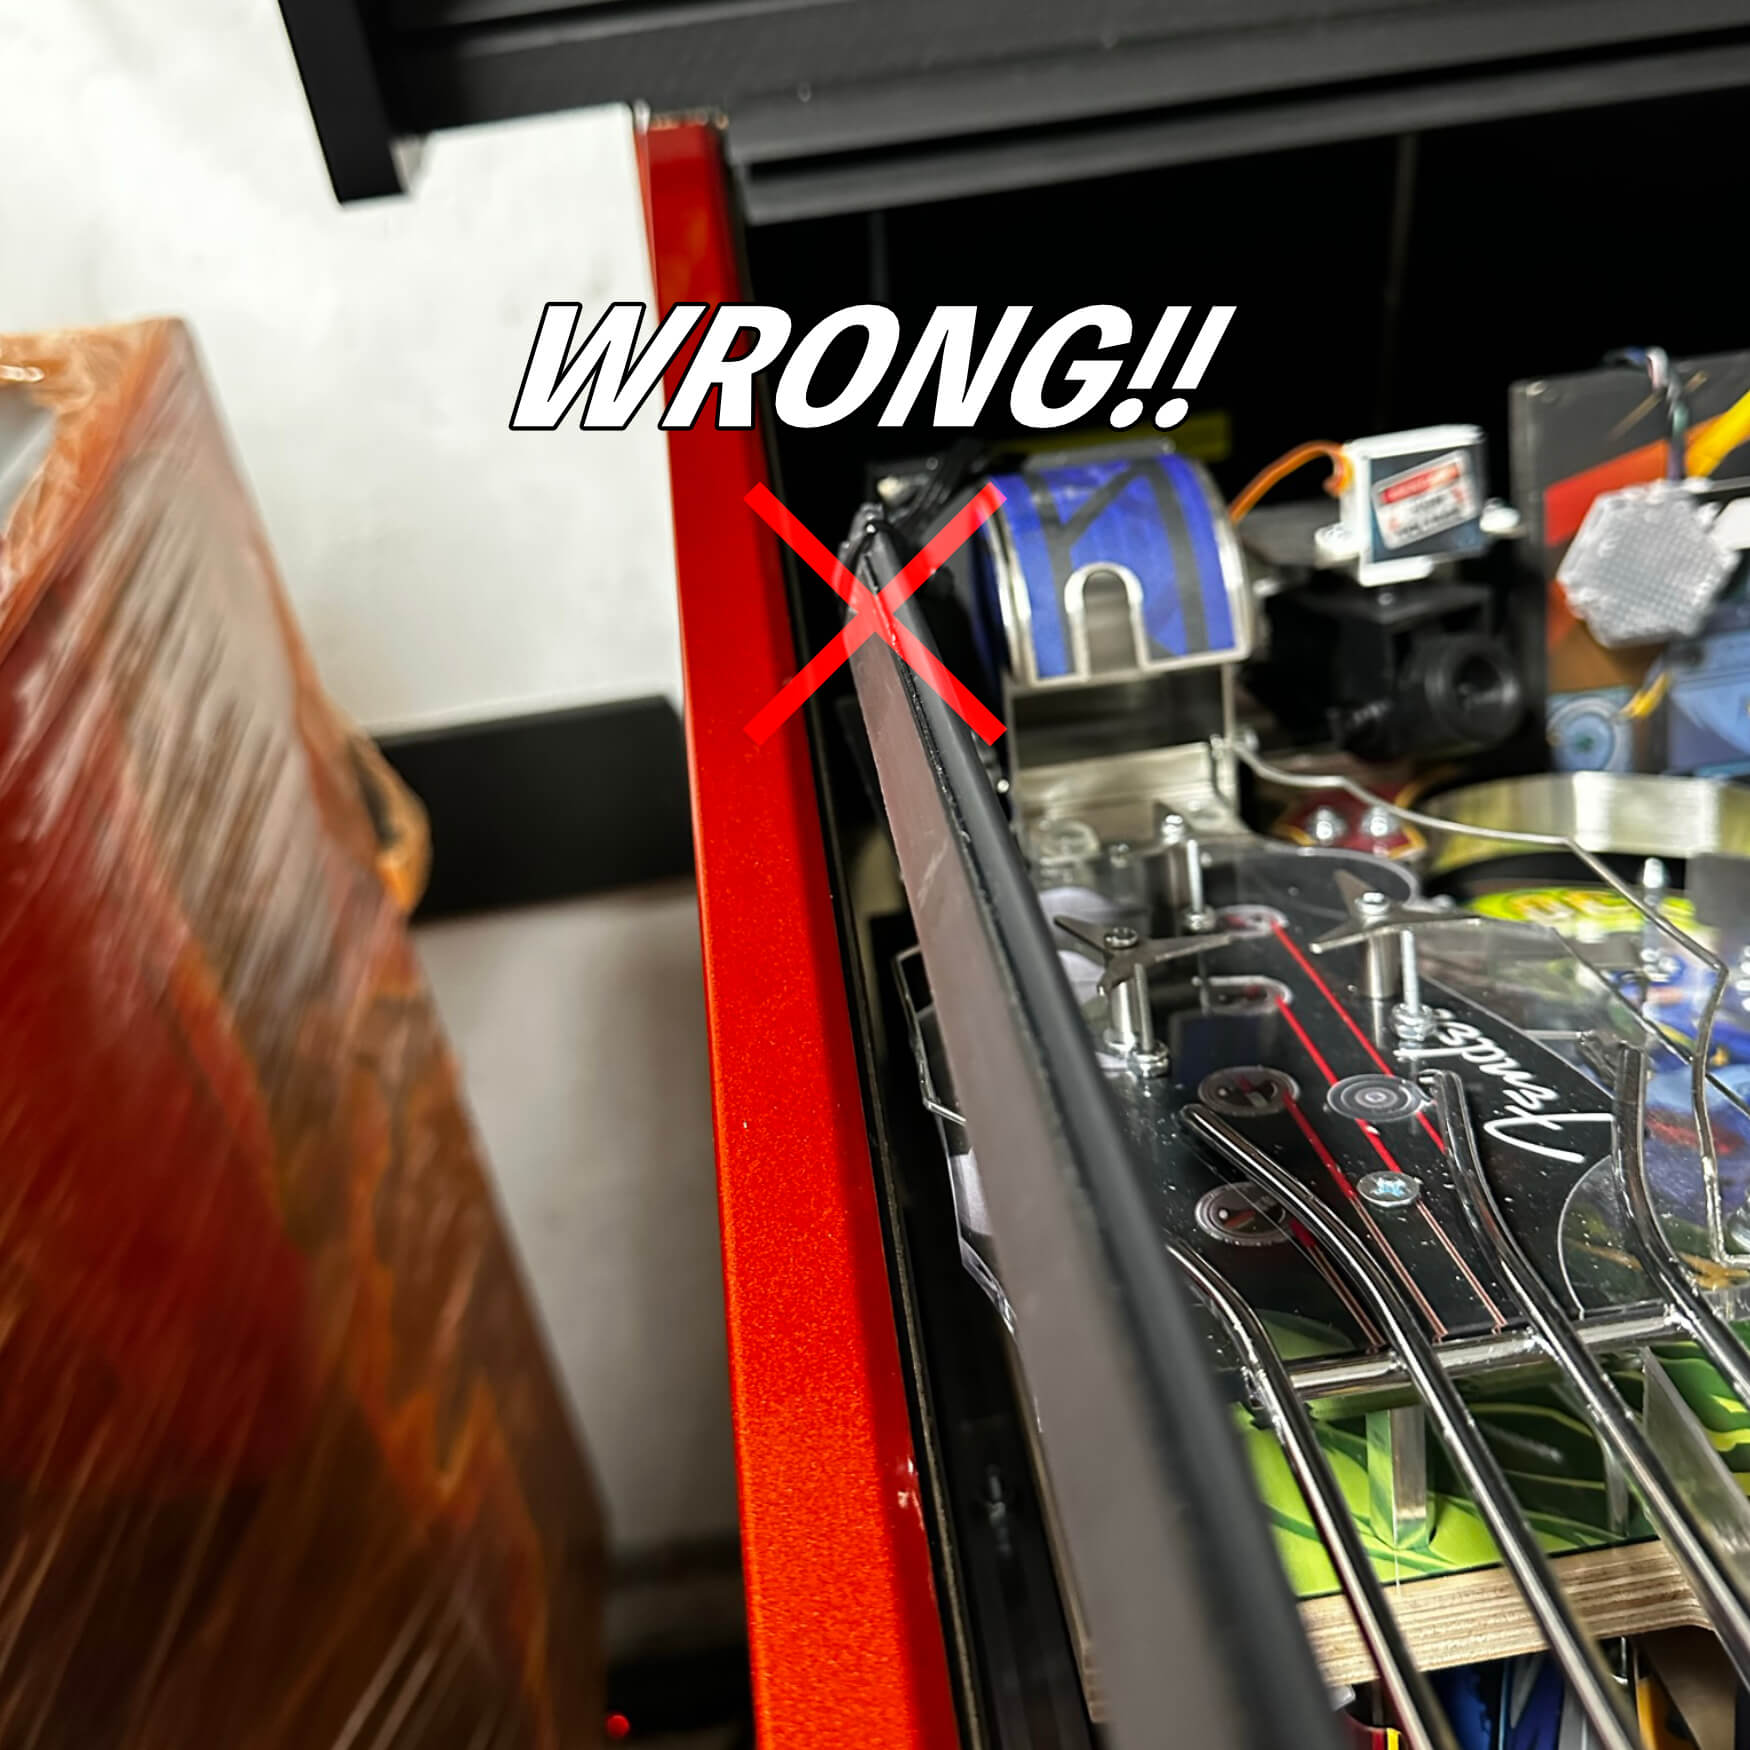
- Zip tie orientation matters: the clasp must be on the inside (playfield side, NOT the cabinet wall side) and facing downward, away from where the glass slides in. Otherwise the glass won’t clear.
- Push the light bar gently forward toward the front mount — just enough pressure to seat it without bowing the bar. While holding that position, tighten the zip tie snug (not crushing) and verify the light bar is vertical. If it’s tilted, it won’t line up with the Magna-Mount when you lower the playfield.

Done with Xenos — now install the Magna-Mounts.
Route the black ribbon cable into the rear cable clamps on the backboard, then install your Magna-Mounts as normal (or skip this if they were already on a previous install). → Back to main install guide
